Saturday, April 13, 2019

Securing a Microservice With Keycloak

Hi there!
In this post, I'll be demonstrating the way I secured a microservice with Keycloak. The sample microservice is created using JAX-RS and deployed to wildfly11.


Prerequisites

  1. Keycloak docker image - https://hub.docker.com/r/jboss/keycloak/
  2. Java 7/8 and Maven 3
  3. Wildfly11

The secured microservice project is hosted on GitHub. Please click here to clone the project.

A look at the Microservice

The microservice contains only a single REST endpoint called PERSON API which will return a json message with the application name, name of the person extracted from query parameter and other sample parameters.

PersonAPI.class 


package com.demo.keycloak.service;

import com.google.gson.Gson;
import com.google.gson.GsonBuilder;
import org.slf4j.Logger;
import org.slf4j.LoggerFactory;

import javax.ws.rs.HeaderParam;
import javax.ws.rs.POST;
import javax.ws.rs.Path;
import javax.ws.rs.PathParam;
import javax.ws.rs.core.Context;
import javax.ws.rs.core.Response;
import javax.ws.rs.core.UriInfo;
import java.util.HashMap;
import java.util.Map;

@Path("/keycloak-demo")
public class PersonAPI {

    private static Gson gson = new GsonBuilder().create();

    @POST
    @Path("person/{name}")
    public Response start(@PathParam("name") String personName, String requestBody,
                          @HeaderParam("Authorization") String authorization, @Context UriInfo uriInfo) {

        Map<String, Object> reponseMap = new HashMap<>();

        final String path = uriInfo.getAbsolutePath().getPath();
        final String appName = path.substring(1, path.indexOf("-"));
        logger.info("\n\n Application Name : " + appName);

        reponseMap.put("CLIENT_ID", appName);
        reponseMap.put("SUCESS", true);
        reponseMap.put("PERSON_NAME", personName);

        return Response.status(200).entity(convertMapToJSONString(reponseMap)).header("Content-Type", "application/json")
                .build();
    }

    public String convertMapToJSONString(Map<String, Object> responseMap) {
        logger.debug("\n\n convertMapToJSONString :: responseMap :" + responseMap.toString());
        return gson.toJson(responseMap);
    }


    private static final Logger logger = LoggerFactory.getLogger(PersonAPI.class);

}

Securing the REST Endpoint 


Below are the keycloak maven dependencies needed. 


    <!-- keycloak jars -->

        <dependency>
            <groupId>org.keycloak</groupId>
            <artifactId>keycloak-core</artifactId>
            <version>${keycloak-version}</version>
            <scope>provided</scope>
        </dependency>
        <dependency>
            <groupId>org.keycloak</groupId>
            <artifactId>keycloak-common</artifactId>
            <version>${keycloak-version}</version>
            <scope>provided</scope>
        </dependency>
        <dependency>
            <groupId>org.keycloak</groupId>
            <artifactId>keycloak-authz-client</artifactId>
            <version>${keycloak-version}</version>
            <scope>provided</scope>
        </dependency>
        <dependency>
            <groupId>org.keycloak</groupId>
            <artifactId>keycloak-adapter-core</artifactId>
            <version>${keycloak-version}</version>
            <scope>provided</scope>
        </dependency>
        <dependency>
            <groupId>org.keycloak</groupId>
            <artifactId>keycloak-adapter-spi</artifactId>
            <version>${keycloak-version}</version>
            <scope>provided</scope>
        </dependency>

Now, we need to secure {{hostname}}/keycloak-demo-service/keycloakDemoService/keycloak-demo/person/ashen by adding constraints and roles to web.xml file.

web.xml


<?xml version="1.0" encoding="UTF-8"?>
<web-app xmlns:xsi="http://www.w3.org/2001/XMLSchema-instance"
         xmlns="http://java.sun.com/xml/ns/javaee" xsi:schemaLocation="http://java.sun.com/xml/ns/javaee http://java.sun.com/xml/ns/javaee/web-app_3_0.xsd" metadata-complete="false" version="3.0">
  <display-name>Restful Web Application</display-name>
  <context-param>
    <param-name>resteasy.scan</param-name>
    <param-value>true</param-value>
  </context-param>
  <context-param>
    <param-name>resteasy.servlet.mapping.prefix</param-name>
    <param-value>/keycloakDemoService</param-value>
  </context-param>

  <!-- keycloak -->

  <context-param>
    <param-name>keycloak.config.resolver</param-name>
    <param-value>com.demo.keycloak.auth.KeycloakAuthResolver</param-value>
  </context-param>

  <security-constraint>
    <web-resource-collection>
      <web-resource-name>REST endpoints</web-resource-name>
      <url-pattern>/keycloakDemoService/keycloak-demo/person/*</url-pattern>
    </web-resource-collection>
    <auth-constraint>
      <role-name>personAPI</role-name>
    </auth-constraint>
  </security-constraint>


  <login-config>
    <auth-method>KEYCLOAK</auth-method>
    <realm-name>JavaSecurity</realm-name>
  </login-config>

  <security-role>
    <role-name>personAPI</role-name>
  </security-role>

  <!--RestEasy-servlet-->

  <listener>
    <listener-class>
      org.jboss.resteasy.plugins.server.servlet.ResteasyBootstrap</listener-class>
  </listener>

  <servlet>
    <servlet-name>resteasy-servlet</servlet-name>
    <servlet-class>
      org.jboss.resteasy.plugins.server.servlet.HttpServletDispatcher</servlet-class>
  </servlet>

  <servlet-mapping>
    <servlet-name>resteasy-servlet</servlet-name>
    <url-pattern>/keycloakDemoService/*</url-pattern>
  </servlet-mapping>

</web-app>

Above snippet configures  the Undertow (Undertow is the Web Server on Wildfly ) to require the users to have certain roles to be allowed to invoke the person endpoint. In this case the person endpoint requires the role personAPI.

Creating a Realm in Keycloak


What is a realm in Keycloak?

A realm manages a set of users, credentials, roles, and groups. A user belongs to and logs into a realm. Realms are isolated from one another and can only manage and authenticate the users that they control.

Create a realm called 'JavaSecurity' 

Creating a Client in Keycloak


Now we need to create a client for the microservice within Keycloak. The client name will be 'keycloak-demo'. Open Keycloak Admin Console in your browser. http://localhost:8080/auth/
Sign in and click on Clients in the menu on the left hand side. Once that's open, click on Create on top of the table and you will navigated to a page as shown below.


Click on Save and you will redirected to a page as shown in below screenshot.  Change the access type to public.
Access Type : Public
Public access is for client side clients that need to perform a browser login.


Now click on the installation tab on top of the form. Select Keycloak OIDC JSON. This should provide a json object as below with required configuration for the keycloak client adapter.


{
  "realm": "JavaSecurity",
  "realm-public-key": "MIIBIjANBgkqhkiG9w0BAQEFAAOCAQ8AMIIBCgKCAQEA2Oj1K8EHWyAkaggvteHnETu3acwn5U8PaU0BixBM1nke5cgNXWE3I5M4zDfmNG2Egub2jmMHyRbF9U10ovQzhE1HhDFN+3ob/+Wz8Dy0ZF6GXAzyWYe64vx1MiDq5764HNQGAv+zSlUD0S7TIbCrw3h9XBJQNqeJsOurpIVu2+M0wxXXOylmIaCVFqf509rMPcdmS+UocZ7+2mAC7eJ5z4u6j5rsBvSK74tKQb7tcJHXcY3TO6owKayUVrdDHnruYhQxQu1x0FeemDrtvv6D7O2FhhOWIBJcvgLyuuyFYH687o/xxaD9Ye+P9SP1NYCbRmlkVQJ3DPs6ibLQkaDr4QIDAQAB",
  "auth-server-url": "http://localhost:8080/auth",
  "ssl-required": "external",
  "resource": "keycloak-demo",
  "public-client": true,
  "use-resource-role-mappings": true
}

This json object is copied to the keycloak.json file inside resources folder. The linking between the keycloak adapter and the keycloak.json happens from KeycloakAuthResolver class. This class overrides the Keycloak config resolver which enables to reside the keycloak.json file externally and provide the path in the standalone.xml file. If the external keycloak.json file is not available, by default it will look into the keycloak,json file inside resources folder.

Creating User and Roles


Create a role called "PersonAPI" under keycloak-demo client as shown below. 


Create a user as shown below.


Assign the "PersonAPI" role to the created user.


Get the access token


Paste the access token to the Authorization header of the Person request as shown below. If the access token is invalid, unauthorized error message will be received.


if valid, below response will be received.


!...Happy Coding...!

Ashen Jayasinghe
DMS
Full Stack Developer

Sunday, March 24, 2019

Refactoring a complex Java EE Monolithic App to Microservices

Hi there! In this blog post, I have addressed some of the major questions that will arise when transforming a Java EE monolithic application to a microservice architecture from my own experience.

I have been working at the final phase of a Java EE monolithic telecommunication application. According to the client requirements, after the final phase, we should break down the functionalities of the monolith application which is packaged on a single WAR archive to multiple micro services. ( multiple JARs and WARs ). Initially, I was assigned for a research task on microservices to identify the best practices, technologies and methods for breaking down the monolith application.

Below are the identified steps from the research in order to migrate the monolith application to microservices.

1. Follow Domain driven design architecture when creating micro-services or decomposing the existing monolith application. (Sub domains, boundary contexts, context maps)
2. Repackage the application
  • Repackage the app into multiple individual WAR files and apply container-per-service pattern and deploy each WAR file separately in to Wildfly or Docker container.
  • Build, deploy, and manage independently: After the WAR files are split, you can manage each WAR file independently through an automated DevOps pipeline.

3. Refactoring the application code.

Existing REST or JMS services ; You might have services that are already compatible with a microservices architecture, or that can be made compatible. Start by untangling each REST or simple JMS service from the rest of the WAR file, and then deploy each service as its own WAR file. At this level, duplication of supporting JAR files is fine—this is still mostly a question of packaging.

Existing EJB services : If you have services, they were probably built by following a functional approach, such as the Service Façade pattern. In this case, you can usually refactor function-based services design into an asset-based services design. If the functions in the Service Façade were written as create, retrieve, update, and delete operations on a single object, the mapping to a RESTful interface is simple: reimplement the EJB session bean interface or JAX-WS interface as a JAX-RS interface.

Internal Structure of a microservice
Calls to external services should be separate from the domain logic. Below figure shows a simplified version of a microservice architecture. This architecture separates the domain logic from any code that interacts with or understands external services. The architecture is similar to the Ports and Adapters (Hexagonal) architecture

Resources expose JAX-RS resources to external clients. This layer handles basic validation of requests and then passes the information into the domain logic layer.

Domain logic, as a general concept, takes many forms. In Boundary-Entity-Control patterns, domain logic represents the entity itself, with parameter validation, state change logic, and so on.

Repositories are optional, but can provide a useful abstraction between the core application domain logic and the data store when present. This configuration allows the backing data store to be changed or replaced without extensive changes to the domain logic.

Service connectors are similar to the Repository abstraction, encapsulating communications with other services. This layer functions as either a façade or an “anti-corruption” layer to protect domain logic from changes to external resource APIs, or to convert between API wire formats and internal domain model constructs.

http://alistair.cockburn.us/Hexagonal+architecture
http://martinfowler.com/articles/microservice-testing/#anatomy-modul


4. Refactoring the data.
  • Isolated islands of data
Begin by looking at the database tables that your code uses. If the tables are either independent of all other tables or come in a small, isolated island of a few tables that are joined by relationships, you can split the tables from the rest of your data design. Then you can consider the right option for your service. For instance, do you stay in SQL, but consider moving from a heavyweight enterprise database such as Oracle to a smaller, self-contained database like MySQL? Or do you consider a NoSQL database to replace your SQL database?

The answer to that question depends on the kinds of queries you run on your data. If most of the queries are simple queries on "primary" keys, a key-value database or a document database might serve you well. Alternatively, if you have complex joins that vary widely—for example, your queries are unpredictable—staying with SQL might be your best option.

  • Batch data updates 
If you have only a few relationships and you decide to move your data into a NoSQL database anyway, consider a batch update into your existing database. When you consider the relationships between tables, the relationships often don't take a time factor into consideration. They might not need to be always up to date—a data dump/load approach that runs every few hours might be fine for many cases.

  • Table denormalization
If you have more than a few relationships to other tables, you might be able to refactor, or in database administrator (DBA) terms, "denormalize," your tables. Even the discussion of this idea might alarm a DBA. However, your team as a whole should think about why data was normalized to begin with. Often, the reason for highly normalized schemas was to reduce duplication, which was to save space, because disk space was expensive. However, that's not true anymore. Instead, query time is now the factor you want to optimize. Denormalization is a straightforward way to achieve that.

https://www.ibm.com/cloud/garage/architectures/microservices/refactor-to-microservices


5.  Inter-service-communication - Use Saga Pattern (Event driven architecture)

Use Saga Pattern to maintain data consistency / usability across services if each service has its own database. 

This pattern has the following benefits
  • It enables an application to maintain data consistency across multiple services without using distributed transactions .
This solution has the following drawbacks:
  • The programming model is more complex. For example, a developer must design compensating transactions that explicitly undo changes made earlier in a saga. 
There are also the following issues to address:
  • In order to be reliable, a service must atomically update its database and publish an event. It cannot use the traditional mechanism of a distributed transaction that spans the database and the message broker. Instead, it must use one of the patterns listed below.

Microservices maturity model


References


https://microservices.io/patterns/microservice-chassis.html
https://www.nginx.com/blog/refactoring-a-monolith-into-microservices/
https://stackoverflow.com/questions/30286443/microservices-how-to-store-source-code-of-many-microservices
https://microservices.io/patterns/observability/health-check-api.html
http://projects.spring.io/spring-cloud/
https://microservices.io/patterns/observability/distributed-tracing.html
https://martinfowler.com/bliki/CircuitBreaker.html
https://dzone.com/refcardz/getting-started-with-microservices?chapter=5
http://callistaenterprise.se/blogg/teknik/2015/03/25/an-operations-model-for-microservices/
http://callistaenterprise.se/blogg/teknik/2017/05/12/building-microservices-part-6-configuration-server/
http://callistaenterprise.se/blogg/teknik/2017/09/13/building-microservices-part-8-logging-with-ELK/
http://callistaenterprise.se/blogg/teknik/2015/04/10/building-microservices-with-spring-cloud-and-netflix-oss-part-1/
https://www.infoq.com/articles/microservices-aggregates-events-cqrs-part-1-richardson


Monday, November 26, 2018

Using Camunda HTTP-Connector

Hi there!

We can use the HTTP Connector in Camunda to call the relevant REST Endpoint from service tasks in the bpmn diagram. According to the below diagram, "Dummy Service 1 and 2"  are service tasks which will invoke the Rest endpoints.


A generic API exists to set parameters of a request. The following parameters are available.


In order to pass the Authorization key as a http header to the REST Endpoint, we have to check whether the auth key has more than 4000 characters. If so, the camunda engine will throw a jdbc exception. https://stackoverflow.com/questions/53471783/how-to-alter-camunda-database-to-accept-long-string-variables

To avoid the exception, you have to use java serialization for persisting the long string value.

RuntimeService runtimeService = processEngine.getRuntimeService();

VariableMap variables = Variables.createVariables();
variables.putValueTyped("var", Variables
          .objectValue(aLongStringValue)
              // tells the engine to use java serialization for persisting the value 
          .serializationDataFormat(SerializationDataFormats.JAVA)  
          .create());

// Start a process instance
ProcessInstance processInstance = runtimeService.startProcessInstanceByKey("testProcess", variables);

Limitations of this approach are:
  1. You cannot use this variable in queries, for example runtimeService.createVariableInstanceQuery().variableValueEquals("var", aLongStringValue).list() would not find the variable
  2. Whenever you fetch the variable, you will have to use the API that returns deserialized values (e.g. RuntimeService.getVariable("name") or RuntimeService.getVariableTyped("name", true)) to get the actual value. This can be a problem if you rely on the feature that the engine can serve variables in their serialized format (which is for a regular String variable just the plain String value; for a Java-serialized Object value, it is a base64-encoded String of the byte representation).
Ashen Jayasinghe
Software Developer 
DMS

Tuesday, October 9, 2018

OAuth 2.0 Simplified with Node.js

Hi there!
OAuth 2.0 is an authentication protocol that is used to authenticate and authorize users in an application by using another service provider. 

In this post, we will authenticate using GitHubs Auth2 API and build a sample node application running on the local port 8080 with a web interface.

You can get the source code from here.

 OAuth2 flow

There are 3 parties in any OAuth flow:
1. Client  - The person or user who is logging in
2. Consumer - The application that the client wants to log in to
3. Service Provider - The external application through which the user authenticates

So in our use-case, the client would be the web interface, the consumer would be the application running on localhost:8080 and the service provider would be GitHub. 

Below diagram explains the flow of the application.

Once we start the application, we will be directed to a page as below.


<body>
        <a href="https://github.com/login/oauth/authorize?client_id=*****&redirect_uri=http://localhost:8080/oauth/redirect">
                Login with github</a>
</body>

The above link has three key parts

1. https://github.com/login/oauth/authorize is the OAuth Gateway for GitHub's OAuth flow. All OAuth providers have a gateway URL that you have to send the user in order to proceed.

2.  client_id=***** this specifies the client id of the application. This ID will tell GitHub about the identity of the consumer who is trying to use their OAuth service. OAuth service providers have a portal where you can register your consumer. I registered my sample node application using the GitHub registration portal found here https://github.com/settings/applications/new.


On registration, you will receive a client id and a client secret which is used in the above URL.

3. redirect_uri=http://localhost:8080/oauth/redirect specifies the URL to redirect to with the request token once the user has been authenticated by the service provider. This URL has also been set when registering the application at GitHub Registration portal (see above screenshot).

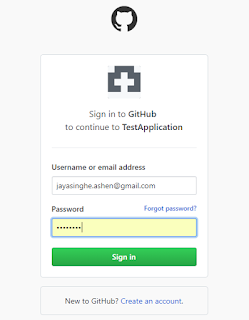
Once you click the "Login with GitHub" link, you will be redirected to the familiar OAuth Page to register with GitHub.


Once the user authenticates with GitHub, they get redirected to the redirect URL that was specified earlier, along with the request token appended to the redirect url, by the service provider (GitHub). GitHub adds this as a code parameter so the redirect url will be something like http:localhost:8080/oauth/redirect?code=<request token>.

We need the request token and client secret to get the access token , which is the token that is actually used to get the information about the user. We get this access token by making a POST HTTP call to https://github.com/login/oauth/access_token?client_id=${CLIENTID}&client_secret=${CLIENTSECRET}&code=${REQTOKEN}


Once the redirect URL execute a POST request to get the access token as explained above, if the access token is received, the user will be redirected to the welcome page. The welcome page is the page we show after the user has logged in. Now that we have the users access token, we can obtain their account information on their behalf as authorized GitHub users.

There are many API's available in GitHub's API Documentation, however we will be using the /user API to get basic information about the user. In the welcome page, first we extract the access token from the browser's query param since we redirected to welcome page with the access token (http://localhost:8080/welcome.html?access_token=<accessToken>), then we call https://api.github.com/user and include the access token as a header. 


The response from the above GET request will have many fields which is shown below through Postman.


Finally, the welcome page will display a greeting which includes the login username extracted from the above JSON payload as ${ res.login }


Ashen Jayasinghe
Full Stack Developer
DMS

Thursday, September 20, 2018

JAVA-JSON Serialization & Deserialization Using JACKSON

Converting JSON String to MAP


try {
   ObjectMapper mapper = new ObjectMapper();
   String json = "{\"JSON\":{\"type\":\"ID\",\"value\":\"vvv\"},\"info\": \"Yes\"}";
   Map<String, Object> map = new HashMap<String, Object>();
   // convert JSON string to Map
   map = mapper.readValue(json, new TypeReference<Map<String, Object>>(){});
   System.out.println("CONVERTING JSON STRING TO MAP--="+map);

  } catch (JsonGenerationException e) {
   e.printStackTrace();
  } catch (JsonMappingException e) {
   e.printStackTrace();
  } catch (IOException e) {
   e.printStackTrace();
  }


Converting MAP to JSON String


ObjectMapper mapper2 = new ObjectMapper();
  Map<String, Object> carMap = new HashMap<String, Object>();
  carMap.put("car", "Audi");
  carMap.put("price", "30000");
  carMap.put("model", "2010");
  List<String> colors = new ArrayList<String>();
  colors.add("Grey");
  colors.add("White");
  colors.add("Black");
  carMap.put("colors", colors);
  try {
   String jsonString = new ObjectMapper().writeValueAsString(carMap);
   System.out.println("Convert Map to JSON String=="+jsonString);
  } catch (JsonProcessingException e) {
   e.printStackTrace();
  }


Converting MAP to JSON Object


try {
   JSONObject jsonObject = new JSONObject(carMap);
   System.out.println("Convert Map to JSON Object=="+jsonObject);
  } catch (Exception e) {
   e.printStackTrace();
  }


Converting JSON Object to MAP

try {
   String jsonjsonString = "{\"JSON\":{\"type\":\"ID\",\"value\":\"vvv\"},\"info\": \"Yes\"}";
   ObjectMapper mapper12 = new ObjectMapper();
   JsonNode jsonNode = mapper12.readTree(jsonjsonString);
   Map<String, Object> mapp = new HashMap<String, Object>();
   mapp = convertJSONObjectToMap(jsonNode);
   System.out.println("Convert JSON Object to Map =="+mapp);
  } catch (Exception e) {
   e.printStackTrace();
  }


Output :


Tuesday, September 18, 2018

Xamarin.Forms - Social Media Application


Hi there!

In this blog post, I have created a Android application using Xamarin Forms that will show a list of posts, comments of each post and the user profile of the author of the post. I have used the  JSON Placeholder service to get the required information.

The application consist of three main screens.

  1. Posts List
  2. Comments for a post
  3. User Profile

The projects are seperately created for data retrieval and the entities (data model).When the application starts, it shows the posts list page. Data fetching happens automatically in the background.

The below video shows a walk through of the Mobile Application developed using Xamarin Forms.


The source code of this application will be shared soon!!!

Ashen Jayasinghe
Software Developer
DMS


Monday, August 27, 2018

Implementing Cross-Site Request Forgery (CSRF) Protection

Hi there!
In this blog post, I will explain how to implement CSRF protection in web applications. But first, 

What is CSRF?

Cross-Site Request Forgery (CSRF) is an attack that forces an end user to execute unwanted actions on a web application in which they're currently authenticated. CSRF attacks specifically target state-changing requests, not theft of data, since the attacker has no way to see the response to the forged request. With a little help of social engineering (such as sending a link via email or chat), an attacker may trick the users of a web application into executing actions of the attacker's choosing. If the victim is a normal user, a successful CSRF attack can force the user to perform state changing requests like transferring funds, changing their email address, and so forth. If the victim is an administrative account, CSRF can compromise the entire web application.

How we can defend against CSRF?

There are numerous patterns to defend against CSRF. In this post, I will explain only two recommended patterns using a sample web application for each pattern implemented in JavaScript.

  • Synchronizer Token Pattern
  • Double Submit Cookies Pattern


Synchronizer Token Pattern


You can find the link to Synchronizer token pattern Web application GitHub repository here. For demonstration purposes, a user login with hard coded credentials are implemented in the web application.  The Synchronizer token pattern is explained using following criteria's.

1.  User login - I have used hard coded login credentials for simplicity.


2. Upon login, generate session identifier and set as a cookie in the browser.


The following code will generate a session identifier and set a session cookie in the browser upon login as show in the chrome developer tool screenshot.

I have used a session middleware called "express-session" and UUID library for defining session id as a best practice.


3. At the same time, generate the CSRF token and store it in the server side.


The CSRF token is stored in memory and mapped to the session identifier. I have not used a CSRF middleware like csurf for creation and validation of a token, instead I have done the csrf implementation step by step.


Note that the console log is for testing purposes.

4. Implement an endpoint that accepts HTTP POST requests and respond with the CSRF token.


The endpoint '/middleware' receives the session cookie and it is validated with the session id stored  in the server side memory store. This session validation process is handled by the session middleware 'express-session' explained in the second step.
If the session id's are matching, the csrf token is returned to the front-end.


5. Implement a webpage that has a HTML form. The method should be POST and action should be another URL ( '/login' ) in the website. When this page loads, execute an Ajax call ( onLoadPage() ) via a javascript, which invokes the endpoint ( '/middleware' ) for obtaining the CSRF token created for the session.


I have used Fetch API to invoke the endpoint '/middleware' and obtain the csrf token when the page loads.


 <htmllang="en">  
  <head>  
   <meta charset="UTF-8">  
   <meta name="viewport" content="width=device-width, initial-scale=1.0">  
   <meta http-equiv="X-UA-Compatible" content="ie=edge">  
   <script>  
    //AJAX CALL
    function onloadPage() {  
     fetch('/middleware', {  
      credentials: 'same-origin',  
      method: 'POST', // or 'PUT'  
      body: {}, // data can be `string` or {object}!  
      headers: {  
       'Content-Type': 'application/json'  
      }  
     }).then((resp) => resp.json()) // Transform the data into json  
      .then(function (data) {  
       console.log(JSON.stringify(data));  
       var form = document.getElementById("form");  
       var input = document.createElement("input");  
       input.type = "hidden";  
       input.name = "_csrf";  
       input.value = data.csrfToken;  
       form.appendChild(input);  
      })  
    }  
   </script>  
  </head>  
  <body onload="onloadPage()">  
   <div class="login">  
    <div class="login-triangle"></div>  
    <h2 class="login-header">Log in</h2>  
    <form id="form" action="/login" method="POST" class="login-container">  
     <p>  
      <input type="email" placeholder="Email" name="email" value="jayasinghe.ashen@gmail.com">  
     </p>  
     <p>  
      <input type="password" placeholder="Password" password="password" value="123456">  
     </p>  
     <p>  
      <input type="submit" value="Log in">  
     </p>  
    </form>  
   </div>  
  </body>  
  </html>  


6. Once the page is loaded, modify the HTML form’s document object model (DOM) and add a new hidden field that has the value of the received CSRF token.


 <script>  
  //AJAX CALL  
    function onloadPage() {  
     fetch('/middleware', {  
      credentials: 'same-origin',  
      method: 'POST', // or 'PUT'  
      body: {}, // data can be `string` or {object}!  
      headers: {  
       'Content-Type': 'application/json'  
      }  
     }).then((resp) => resp.json()) // Transform the data into json  
      .then(function (data) {  
       console.log(JSON.stringify(data));  
       var form = document.getElementById("form");  
       var input = document.createElement("input");  
       input.type = "hidden";  
       input.name = "_csrf";  
       input.value = data.csrfToken;  
       form.appendChild(input);  
      })  
    }  
   </script>  

Once we obtain the csrf token returned from '/middleware' endpoint, we obtain the form id and assign it to a variable called 'form' and then, create a input type element and assign it to a variable called 'input'. 
Thereafter, we set input type, name and value as hidden, '_csrf' and the csrf token value obtained from the ajax call when the page loads and then we append the updated input element as one of the child elements to the html form element.


7. Once the HTML form is submitted to the action, in the server side, extract the received CSRF token value and check if it is the correct token issued for the particular session.


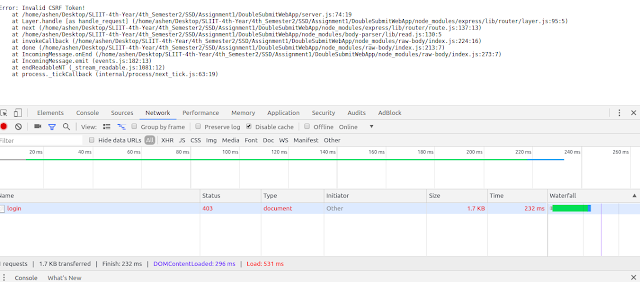
In the above code, we check if the session csrf token and the csrf token passed from the hidden input field or body is the same. if it is same, then we show a success message shown in the screenshot. If it is not same, we show 'Invalid CSRF Token' error message.


Double Submit Cookies Pattern


You can find the link to Double Submit Cookies Pattern Web application GitHub repository here.

Step 1 and 2 is same as the Synchronzier pattern.  But in step 3, we generate a csrf token for the session and set a csrf cookie in the browser.

3. At the same time, generate the CSRF token for the session and set a csrf cookie in the browser.


Note that we don't store the csrf token in the server side. The reason we set httpOnly flag to false is to allow JavaScript to access the csrf cookie when the page loads. 


4. Implement a webpage that has a HTML form. The method should be POST and action should be another URL in the website.


5. When the html form is loaded, run a javascript which reads the csrf token cookie value in the browser and add a hidden field to the html form modifying the DOM.


Since we have set the httpOnly flag to false, we can access the csrf cookie in the browser. We obtain all the cookies using document.cookie and split the key value pairs using ' ; '. After splitting, we pass the key value pairs to a array. Using a for loop, we identify the csrf cookie by using the csrf cookie name we set in the server side. Then we extract the csrf token value and create a input element and append the input element to the html form element with the csrf token.

If we have set httpOnly flag to true,  we would get the below error response.


When the form is submitted to the action, the CSRF token cookie will be submitted and also in the form body, the CSRF token value will be submitted. 


6. In the web page that accepts the form submission ('/login'), obtain the CSRF token received in the cookie and also in the message body.


req.cookies._csrf is the csrf cookie with the csrf token value which was passed to the server side after submitting the form. req.body._csrf contains the csrf token value in the hidden field inpu
t explained in step 5. . if both values are matching we get a success message as below.


IMPORTANT: Note that all the console logs in the implementation are for testing purposes. 

Ashen Jayasinghe
Full Stack Developer
DMS